
Gman
Members-
Content count
41 -
Joined
-
Last visited
Posts posted by Gman
-
-
Yes, I'm thinking that Mr. Scott's barrel is going to set a record. Good luck to you.
-
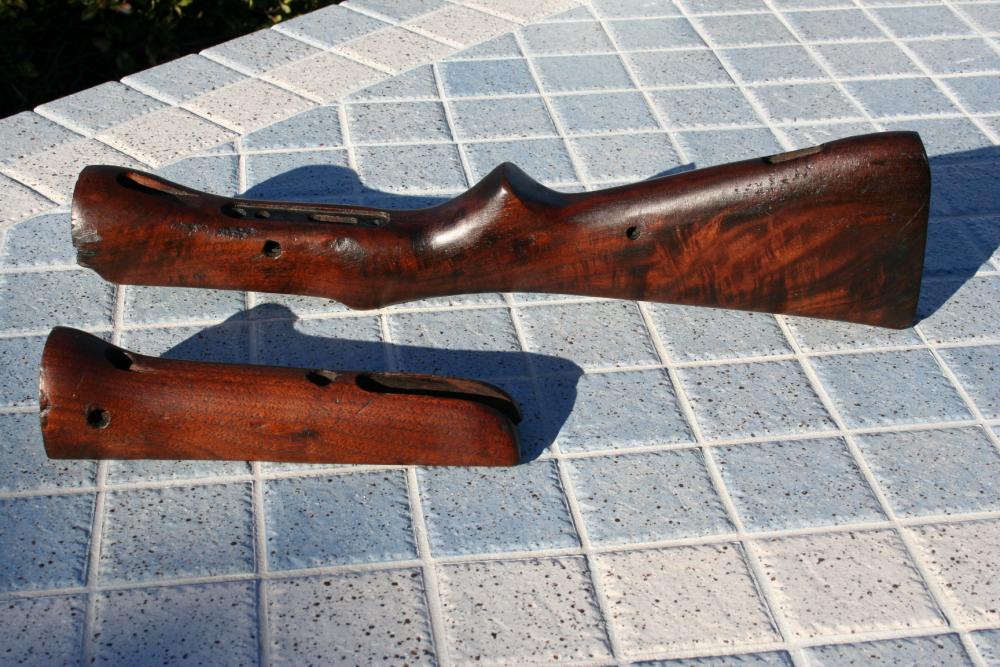
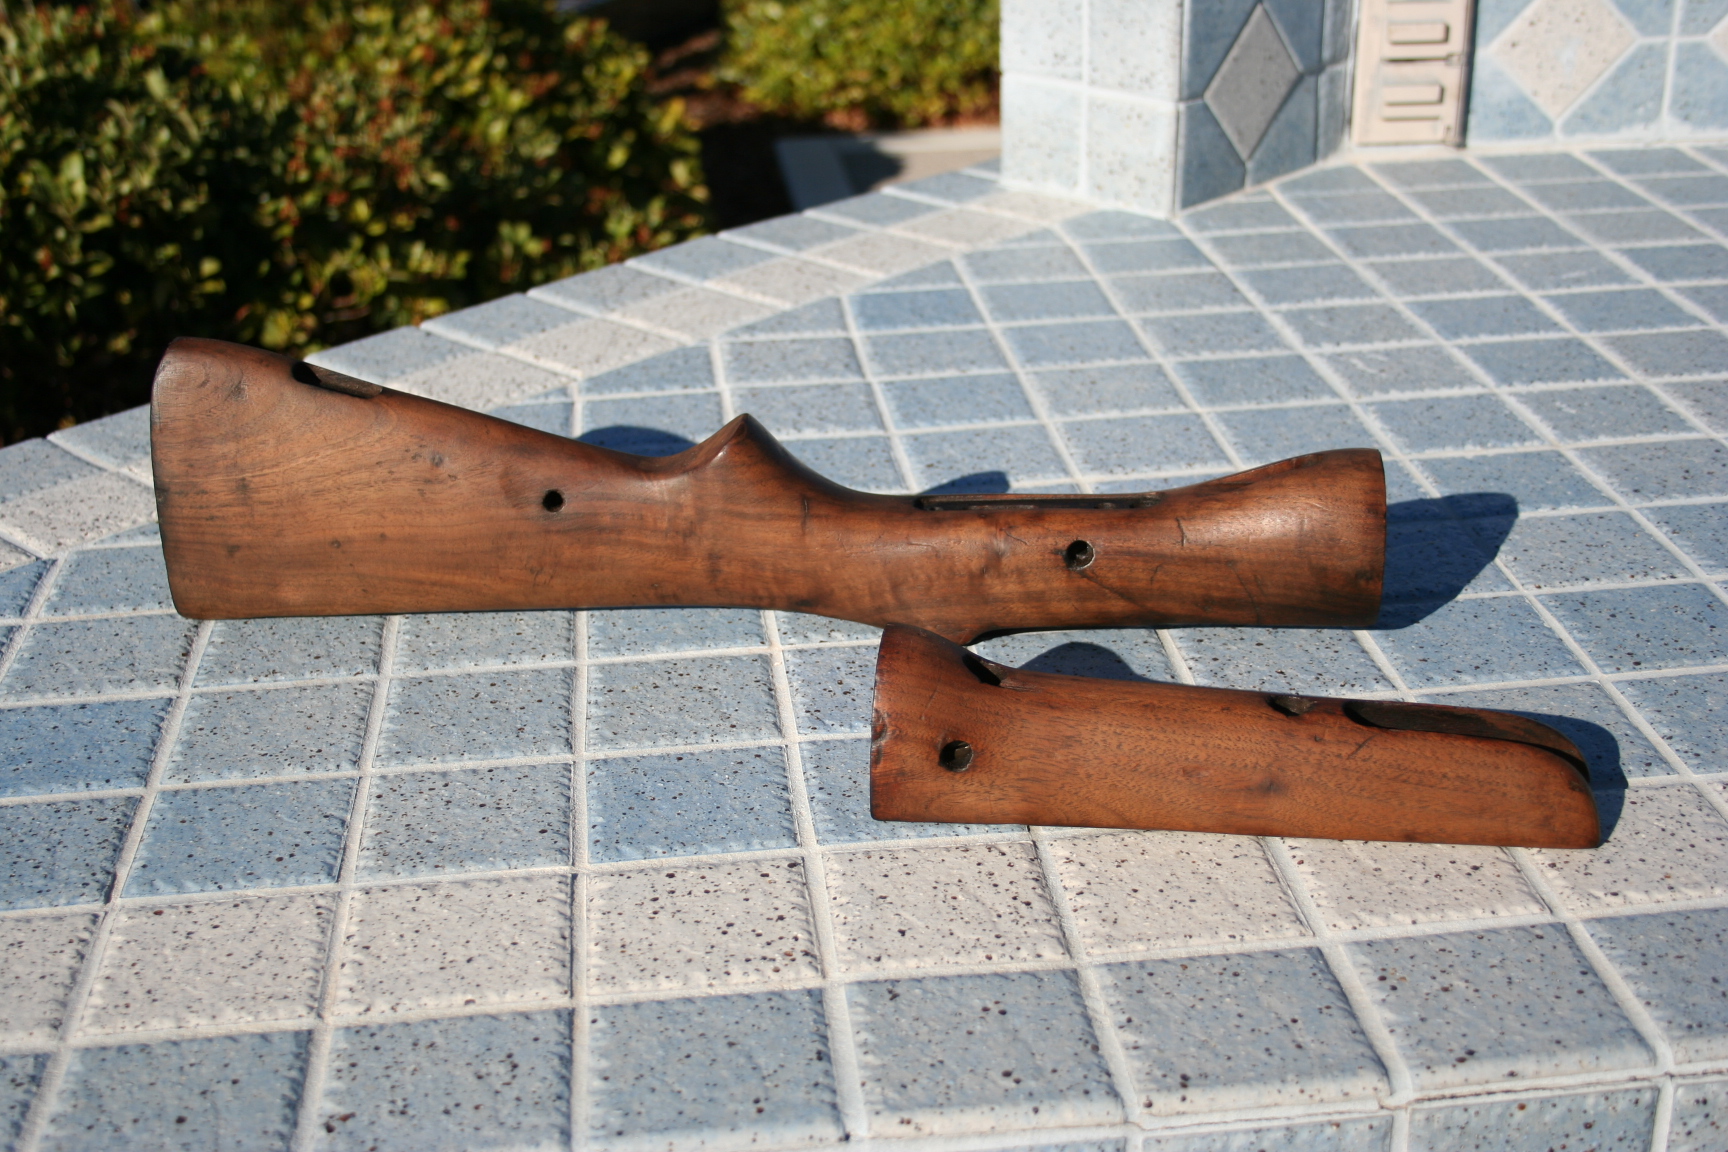
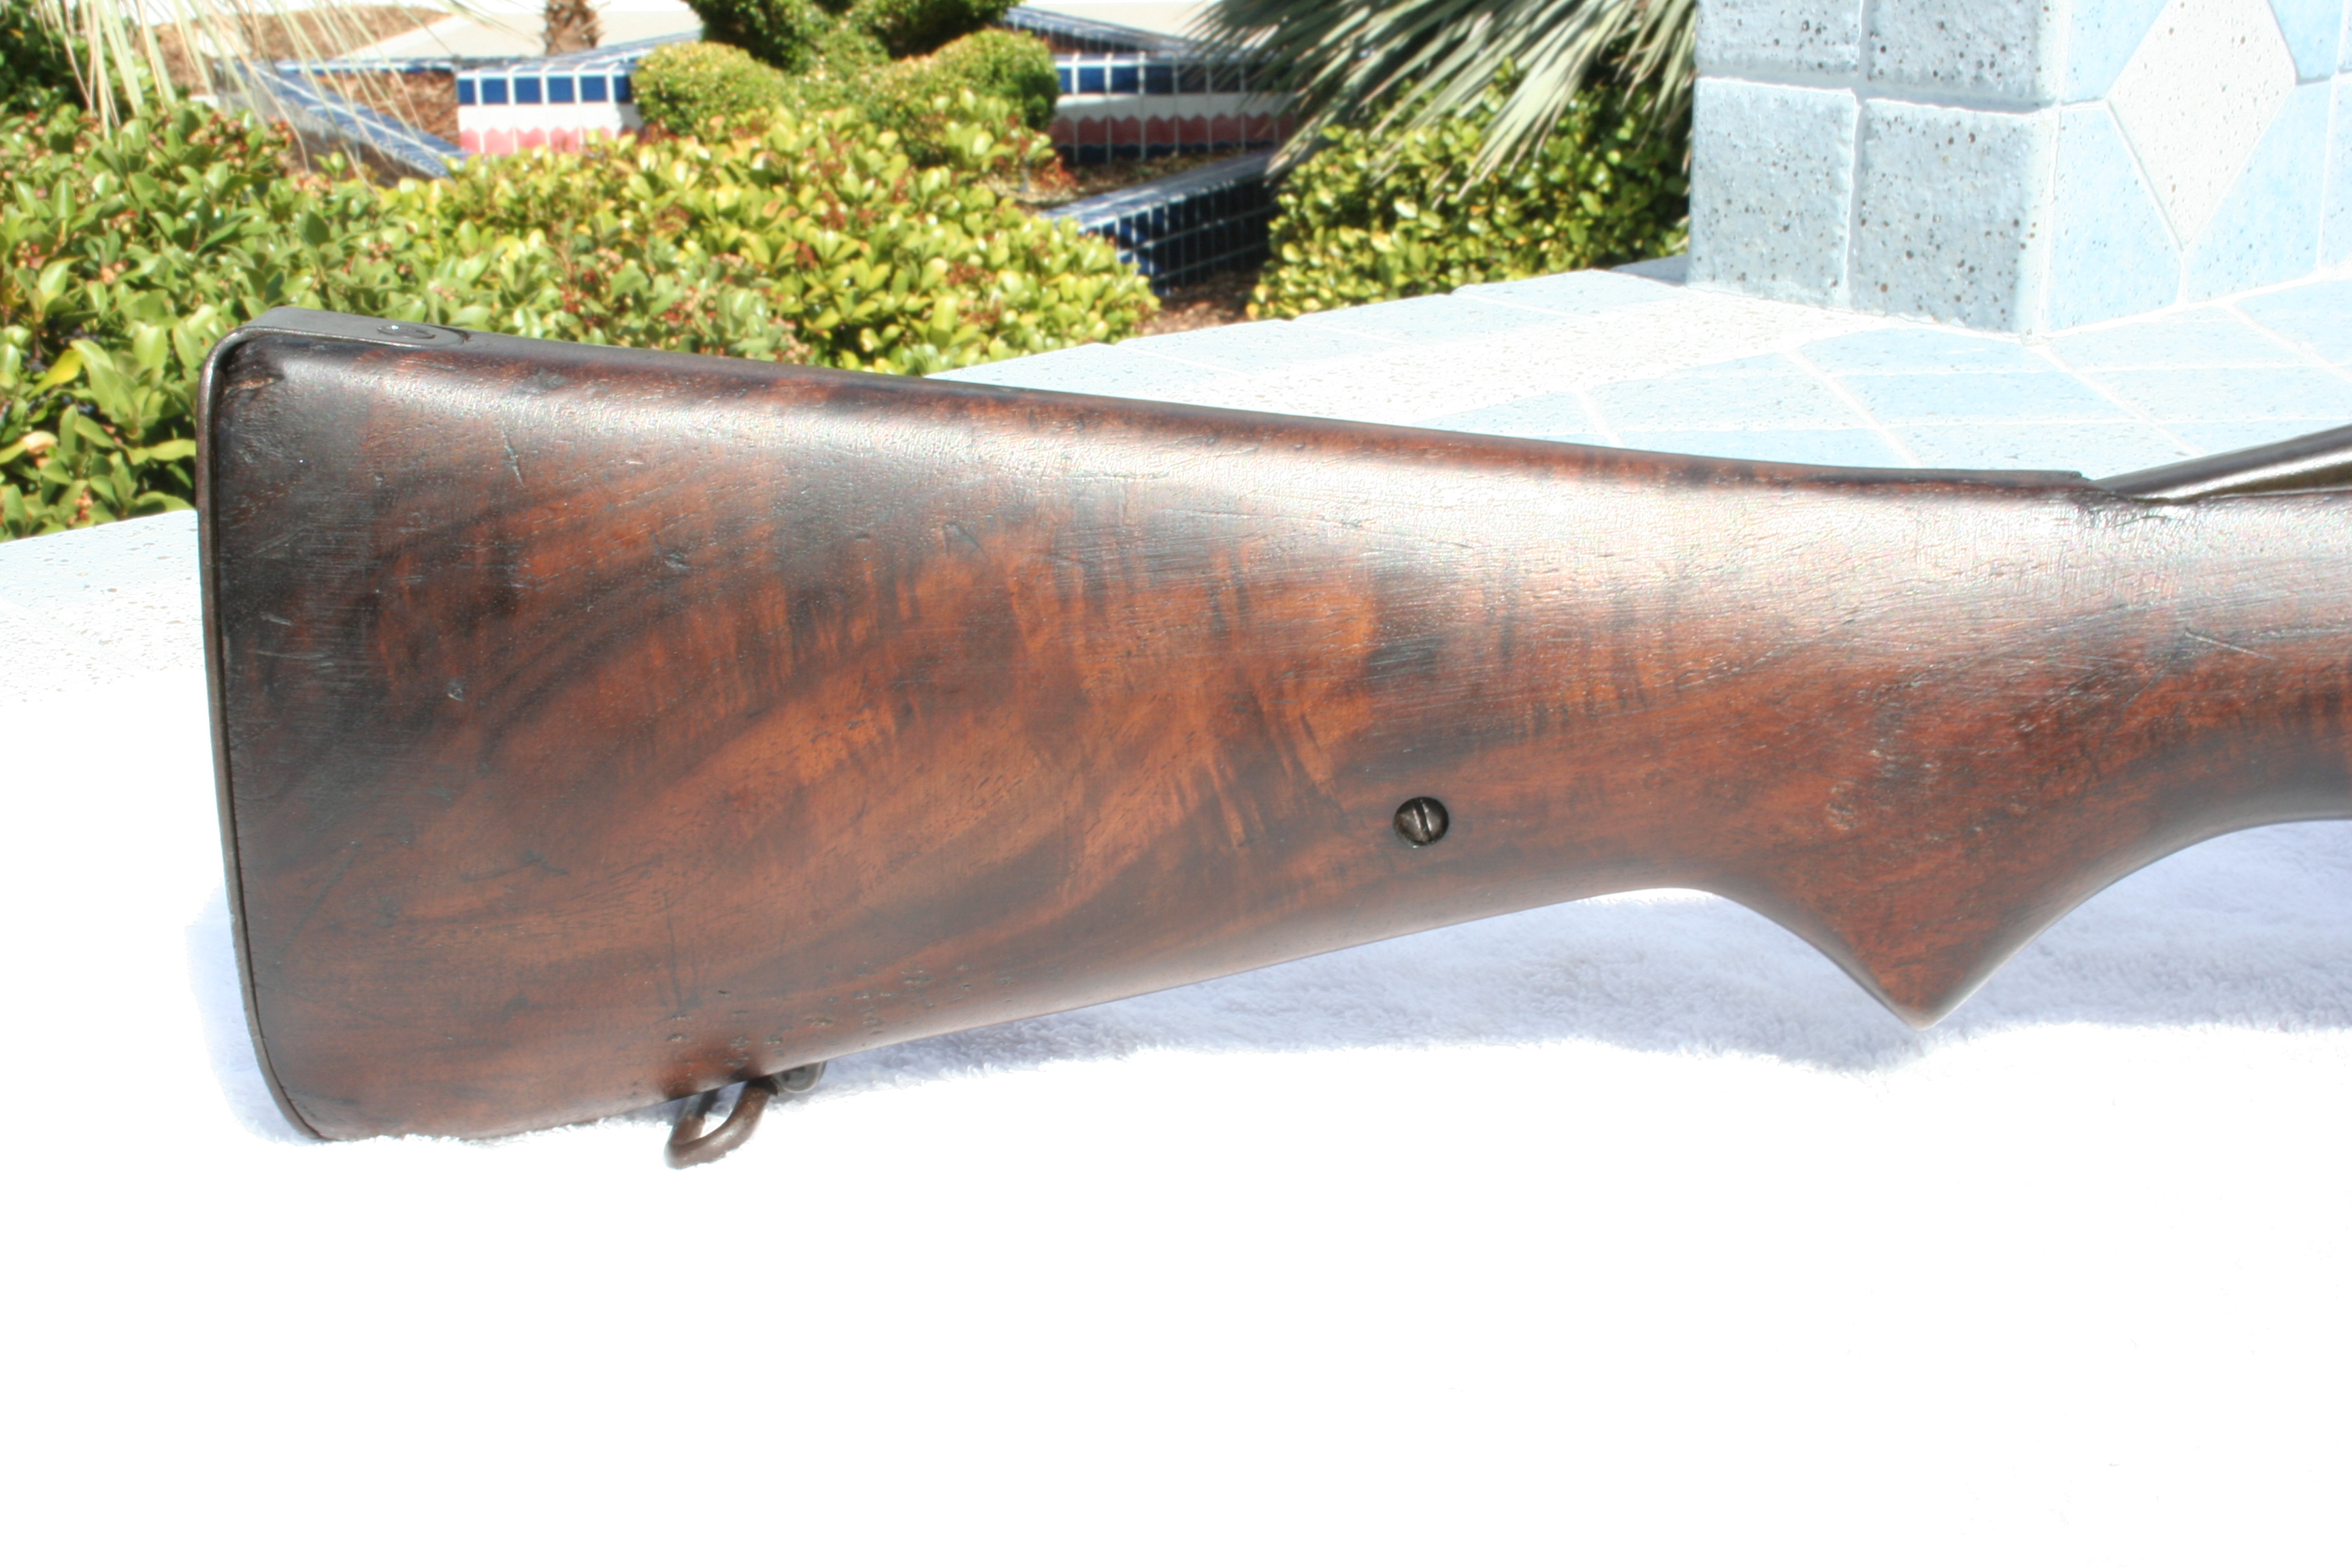
When I got one of mine from an online purchase, it arrived slightly rusty as it had been stored in a damp basement. The stock was very dark, sticky and smelled bad so I refinished it. As I recall, I used mineral spirits to strip it and let it sit for a few days in the sun to get the smell out. I did not sand it as I wanted to preserve the original sanding/handling marks. My research led me to choose between linseed oil and tung oil as referenced in the links below. I chose tung oil as it is more waterproof and IMHO gives more protection from skin oils and sweat. Before the tung oil was applied, I also applied a Minwax stain as it penetrates and seals in addition to staining. Tung oil, when dried, is not slippery. As it stands now, rub you finger on the finish and it will squeak.
http://www.garandgear.com/m1-garand-new-oil-finish


-
Wow, this one went for $5,527.00 (plus tax and shipping) and without any pictures showing the condition of the insides. Doesn't look like the seller offered an inspection period either.
-
Saw this on GB today. Rifle looks like it was shoved barrel first into the mud and left there. If someone has an extra barrel, this might be the one for you. Low starting bid with 14 bids already.
https://www.gunbroker.com/item/904273160

-
Thanks for your comments, gentlemen. I hope it goes to a good home.
-
I put my really special B series up on Gunbroker last night after much hesitation. Kinda sorta didn't want to sell it but age is catching up with me and I need to start clearing out the safe so the wife doesn't have to. I was hoping that it wouldn't sell, but someone has already bid on it. I posted a couple of pics in the gallery years ago but there are dozens on the GB site. Here is the link if you'd like to take a look:
https://www.gunbroker.com/item/895160573
For the record, I will be keeping my A series that I rescued from someone's damp basement years ago. After cleaning off the rust and refinishing the the old gal, she became my best shooter. Go figure.
Semper Fi
-
I've got a repro bayonet. PM sent.
-
Joe, so glad to hear you are recovering. Best wishes to both you and Ed.
Here's to a better 2019.
-
I did a search a couple of months ago and saw that Mr. Scott had some last year. Sent him a PM and an email but haven't heard from him.
So, I'm wondering if anyone else has one. Please send me a PM if you do.
-
Darn. Sold my pristine 7mm barrel last month for only $750.
-
Just listed my oldest M1941 Johnson SN 3539 on GB. Item # 789462193 - penny start, no reserve.
I also listed a super nice 7mm barrel on fleabay: https://www.ebay.com/itm/1941-Johnson-Rifle-Barrel-7mm-Chilean-contract-reimport-with-locking-bushing/273519585848?hash=item3faf09aa38:g:0fcAAOSwC0dbzS38:rk:2:pf:0
Thanks
-
If you look closely, you will see that the bolt didn't make it all the way back on the fourth shot and the brass was reinserted into the chamber. Therefore, the bolt did not lock. So, I would call it a short cycle with a failure to eject. You can watch it real time in the middle of the film and you will notice that the brass does not eject. As for the cause, I can only relate what happened to me. One of mine did the same thing due to chamber roughness. Since I polished the chamber, she's been good as new.
-
It's been around for awhile, but I just found it. One of our friends to the north shooting his M1941 with some good slow motion shots.
Although he doesn't mention it, the rifle malfunctions after the fourth slow motion shot. See if you can tell what the problem was. Here's the link:
-
-
My no-prefix JSAR is a well used re-import with a fairly shot out barrel. I've tried everything from Lake City ammo to hand loads of various bullet/brass/powder combinations but it has been a 10 MOA rifle at best.
That is until I tried some Moly coated Hornady 168 grain HPBT bullets. Loaded with 41.5 grains of H4895 this barrel, which will swallow a bullet at the muzzle, is now shooting a 2" MOA at 100 yards. Now, it's shooting slightly better than the 7mm new looking barrel that I bought to replace it. BTW, I've clocked this load at between 2223-2288 fps.
As usual, this is for informational purposes only. Do not try this in your own home.
-
Mr. Johnson, I'm sure you've considered donating to different gun museums around the country. You probably haven't heard about one of my favorites that is in Claremore, OK. It's the Davis Arms Historical Museum - home to over 13,000 firearms - on historic Route 66.
As it is near Tulsa, I imagine that Mr. Scott has visited. Here is the link to their website: http://www.thegunmuseum.com/
-
Gman,
Would you mind sending me a pm with a description of your methods of preparing the metal for Oxpho-blue and applying it? Or just post it here if others would like to know also. Thanks, TANKER
Oops, sorry. I just revisited this thread. Here's how I did it.
First I "Googled" the process and read a lot of information on other gun boards. Combining that information with the Oxpho-Blue directions and using some trial and error, I arrived at this process (this is for retouching, not a complete refinish):
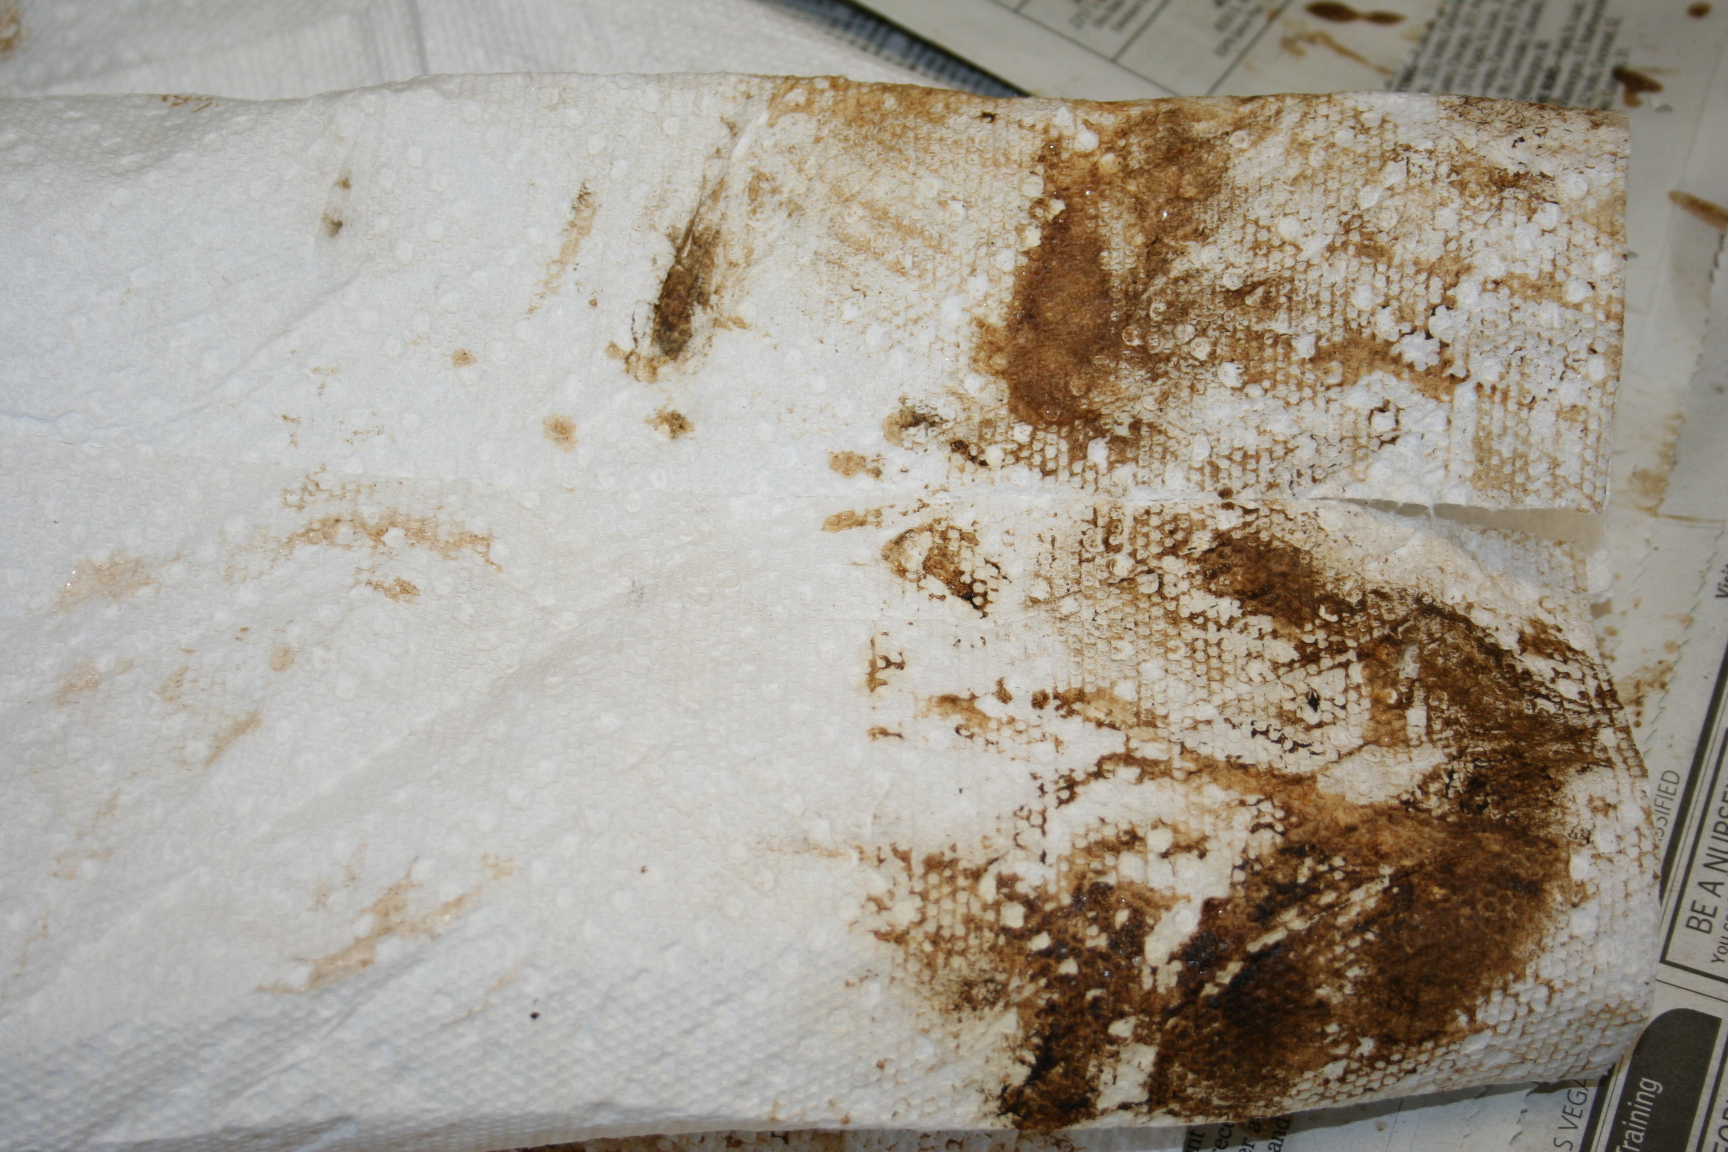
1. Remove as much rust as possible and clean with alcohol. I didn't want to use an abrasive as suggested on the bottle as I wanted to preserve as much of the original finish as possible. Steel wool wouldn't work at first because the rust tore it apart. Following another's suggestion, I smashed the throat of a spent 30-06 cartridge and used it as a scraper. It worked great. Once the big chunks of rust were knocked down the steel wool went to work. I used 0000 steel wool. Remember, you can't get into the rust pits with the wool. That's the chemical's job.2. Saturate a small cotton ball with solution and cover the entire part. Areas not darkening should be re-cleaned and solution re-applied. You can control the darkness by how much you apply and how fast you apply the solution. Also, you can re-apply it over itself to darken. I kept at it until I matched what was left of the original finish.
3. Allow the chemical to work without drying 60 seconds and wipe dry in one pass with a clean cloth.
4. Now, the bottle instructions say when completely dry, burnish with #0 steel wool, or finer. Do not do this unless you want the part to be shiny and look like it was blued. Just wiping the part dry keeps the "Parkerized" character that you are probably looking for.
5. I let the parts sit for 24 hours and applied Remoil.Regards,Gary -
I just take a short flat blade screwdriver to the range with me and snug the screws up every so often. Loctite® sounds like a good idea and might be worth trying, but I like to loosen my stock screws before I put the rifle back in the safe.
-
Regarding Oxpho-blue, I used it to rescue a rusty Johnson that I purchased on GB. Here are before and after pics of the barrel.
Before
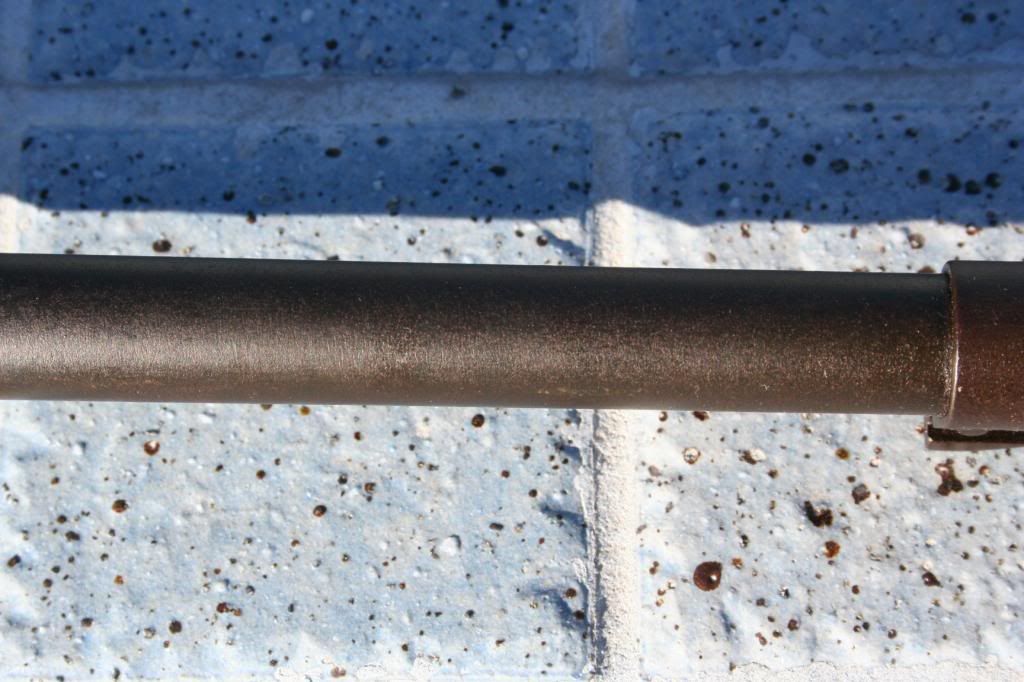
After
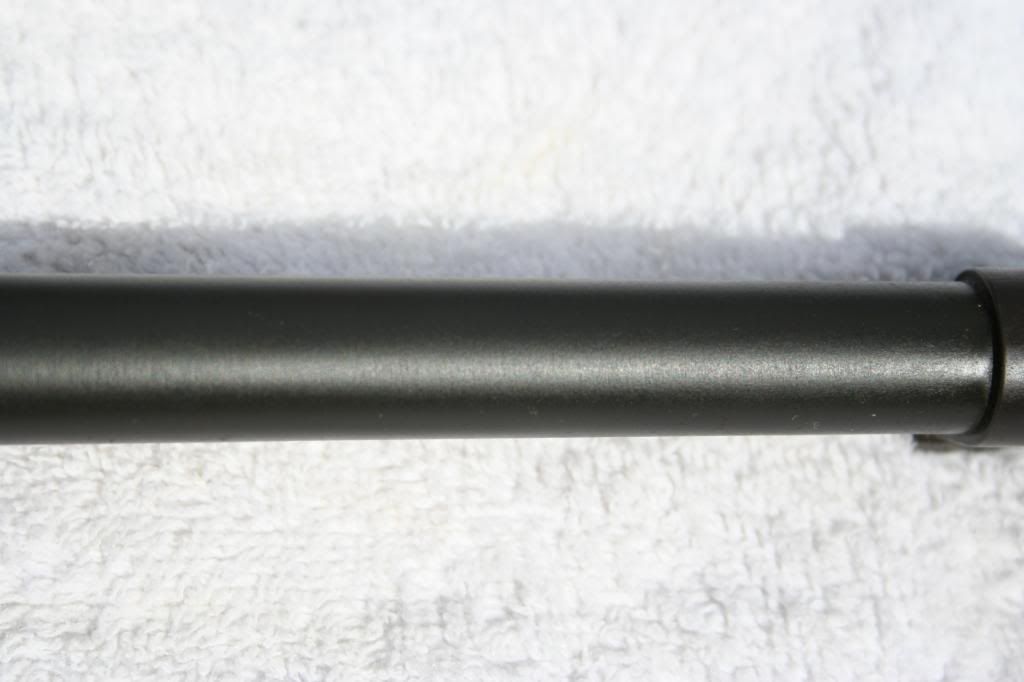
This one is now my best shooter. Thank goodness the bore was practically pristine with just some minor pitting at the muzzle. So, yes I recommend Oxpho-blue.
The last Johnson I saw at a gun show that was re-parked was so tight that it would not cycle.
-
One of mine had that problem when I received it. The cleaning that Mr. Scott suggested helped, but I couldn't fix the problem until I discovered a small spot of brass protuding from a pit in the chamber. I used a dental pick (Harbor Freight) to pull the brass from the pit and have had no more problems with extraction.
-
Hey Tanker, I was surprised that you weren't bidding on it. I'm kind of glad however, because I'm the lucky *** that won it. I couldn't believe that there wasn't that much interest in it. Tell you what, you can have the next one as my collection is now complete.
Brian, I hope you got what you needed for it and I'll contact you directly to work out the details.
-
Thanks, Emmagee. When this first happened, it appeared to me that the design of the bolt and its camming action would prevent the firing pin from protruding through the bolt face upon closing. However, this appears not to be the case with this rifle. My other Johnson has never doubled on me so that led me to check the firing pins against each other finding that this one was visibly longer.
I put in a new firing pin spring and went back to the range today. The pin still dimpled the primer after firing. I also had taken my whetstone and after several cycles of fire, check, strip, stone, reassemble and repeat, I got the pin just the right length. It no longer leaves a mark on the primer when cycling. Ugly Betty now shoots well (one at a time), tosses the brass about six feet away and doesn't destroy the cases anymore. Life is good.
Regarding primers, as you probably know, Springfield specifies military ammo because of its hardened primers. When I reload for my semi-automatics, I always use CCI #34 primers as the company says they are mil spec.
Semper Fi
-
Well, here is the report from the range. I put about thirty rounds through her without a double. Before going, I shortened the pin by .007" (still .010 longer than my other one).
It finally occurred to me to check something that I read about on a Garand website a couple of years ago. Load two, fire one and then check the primer. Sure enough the primer was dimpled. So I still think this firing pin is too long.
Thanks for everyone's input. Any other ideas, or does someone have access to the working drawings so that the design length can be determined?
-
Thanks, Tanker. The spring seems to be OK when compared to a new one I bought last year.
However, while rotating the firing pin by hand and working it back and forth in the bolt, I did find some binding. I then checked the firing pin for run-out using a case gauging tool that I have. I found the forward half of the firing pin to be bent causing the pin itself to wobble about an eighth of an inch which caused the binding.
I can only guess that this was caused by someone using high powered ammo instead of M2 ball - or maybe the pin is, in fact, too long. Using my bench vise to support the lower half of the firing pin I was able to straighten it out by hand. Run-out now measures zero. I'll try it out at the range tomorrow.
Happy 4th to everyone.
Semper Fi

in Johnson 1941 Rifle
Posted · Report post
Just spotted a barrel on flea-bay for $695. Looks OK but it has some strange machine marks in front of the locking collar and some pitting on one of the locking lugs. https://www.ebay.com/itm/335250241295?itmmeta=01HPHG8TWE9EAKG3G33X0G55BF&hash=item4e0e78b70f:g:GvMAAOSwWSNlxb9V&itmprp=enc%3AAQAIAAAAwIHkjg%2BKuKOT9TAcrl04ATZ%2FIciWLzS8yX2RQDevl6cbhdmbAoMItCXv6lMOcsXbDOp3ywE1FPEJAWIwdexs641RMsvW2mEP60qvUp9jMHSzXbzO13i6Okti45i85k3bbf8mJKV4gCpegevQXBHc%2BQjjDWo1aXVSFMSNn9KLSh%2BET1ydlqgptotJ9o4VKg7TeFZeTUWEbcCRwarQZYh63E%2BEqMCFGHK8R86QdOGiLECEsVNbHghb6%2BUtaqEjhciW%2BQ%3D%3D|tkp%3ABk9SR66uo7C0Yw